从自建了邮箱服务后,再加上自建企业微信的消息推送可玩性也更加灵活起来,加上脚本自动化部署后就再也不用手动一个一个的安装升级和维护了。在客户端上发邮件可以避免敏感数据的配置,Mailpit 默认就是端口可达即接收。
让AI写脚本给vps增加监控
现在DeepSeek在写shell 脚本的能力比GPT高上不少,本文脚本都是它写的。
- system_monitor.sh
#!/bin/bash
# 高精度系统监控脚本(严格格式控制版)

# 配置项
CPU_THRESHOLD=90
MEMORY_THRESHOLD=90
DISK_THRESHOLD=90
NETWORK_THRESHOLD=1
CHECK_INTERVAL=60
ALARM_COOL_DOWN=300

# 邮件和日志配置
MAILPIT_HOST="mail.maifeipin.com"
MAILPIT_PORT=1025
SENDER_EMAIL="sender@example.com"
RECEIVER_EMAIL="receiver@maifeipin.com"
LOG_FILE="/var/log/system_monitor.log"

# 初始化日志
exec >> "$LOG_FILE" 2>&1
echo "==== 监控脚本启动 $(date '+%F %T') ===="

# 获取CPU使用率(纳秒级精度)
get_cpu_usage() {
    local cpu_stats=($(grep '^cpu ' /proc/stat))
    local total=$(( ${cpu_stats[1]} + ${cpu_stats[2]} + ${cpu_stats[3]} + ${cpu_stats[4]} ))
    local idle=${cpu_stats[4]}

    if [[ -n $PREV_TOTAL ]]; then
        local diff_total=$((total - PREV_TOTAL))
        local diff_idle=$((idle - PREV_IDLE))
        echo $(( 100 * (diff_total - diff_idle) / diff_total ))
    fi

    PREV_TOTAL=$total
    PREV_IDLE=$idle
}

# 获取内存使用率(精确到KB)
get_mem_usage() {
    local mem_total=$(awk '/MemTotal/{print $2}' /proc/meminfo)
    local mem_avail=$(awk '/MemAvailable/{print $2}' /proc/meminfo)
    echo $(( (mem_total - mem_avail) * 100 / mem_total ))
}

# 获取磁盘使用率(严格数字提取)
get_disk_usage() {
    df --output=pcent / | awk 'NR==2{gsub("%",""); print $1}'
}

# 网络检测(严格格式控制)
get_packet_loss() {
    local ping_output=$(ping -c 3 -W 2 qq.com 2>&1)
    if [[ $ping_output =~ ([0-9]+)%[[:space:]]+packet[[:space:]]+loss ]]; then
        echo "${BASH_REMATCH[1]}"
    else
        echo "100"  # 当无法检测时视为完全丢包
    fi
}

# 邮件发送(强制UTF-8编码)
send_alert() {
    local subject="$1"
    local body="$2"

    {
        echo "EHLO $(hostname)"; sleep 0.3
        echo "MAIL FROM:<$SENDER_EMAIL>"; sleep 0.3
        echo "RCPT TO:<$RECEIVER_EMAIL>"; sleep 0.3
        echo "DATA"; sleep 0.3
        echo "From: <$SENDER_EMAIL>"
        echo "To: <$RECEIVER_EMAIL>"
        echo "Subject: =?UTF-8?B?$(echo -n "$subject" | base64)?="
        echo "Content-Type: text/plain; charset=UTF-8"
        echo "Content-Transfer-Encoding: base64"
        echo
        echo -e "$body" | base64
        echo "."
        sleep 0.3
        echo "QUIT"
    } | timeout 5 telnet "$MAILPIT_HOST" "$MAILPIT_PORT" >/dev/null 2>&1
}

# 主监控循环
trap 'echo "[$(date "+%F %T")] 安全退出"; exit 0' TERM INT
LAST_ALARM_TIME=0
PREV_TOTAL=
PREV_IDLE=

# 首次获取CPU基准
get_cpu_usage >/dev/null

while sleep $CHECK_INTERVAL; do
    TIMESTAMP=$(date "+%F %T")

    # 获取监控数据(带格式校验)
    CPU=$(get_cpu_usage)
    MEM=$(get_mem_usage)
    DISK=$(get_disk_usage)
    NET=$(get_packet_loss)

    # 严格格式化日志输出
    printf "%s CPU=%3d%% MEM=%3d%% DISK=%3d%% NET=%3d%%\n" \
        "$TIMESTAMP" "${CPU:-0}" "${MEM:-0}" "${DISK:-0}" "${NET:-100}"

    # 阈值检查(安全数值比较)
    ALERTS=()
    [[ $CPU =~ ^[0-9]+$ ]] && (( CPU > CPU_THRESHOLD )) && ALERTS+=("CPU:$CPU%")
    [[ $MEM =~ ^[0-9]+$ ]] && (( MEM > MEMORY_THRESHOLD )) && ALERTS+=("MEM:$MEM%")
    [[ $DISK =~ ^[0-9]+$ ]] && (( DISK > DISK_THRESHOLD )) && ALERTS+=("DISK:$DISK%")
    [[ $NET =~ ^[0-9]+$ ]] && (( NET > NETWORK_THRESHOLD )) && ALERTS+=("NET:$NET%")

    # 触发报警
    if (( ${#ALERTS[@]} > 0 )); then
        CURRENT_TIME=$(date +%s)
        if (( CURRENT_TIME - LAST_ALARM_TIME >= ALARM_COOL_DOWN )); then
            SUBJECT="【报警】$(hostname)-${ALERTS[*]}"

            BODY="▌ 异常指标\n"
            BODY+=$(printf "%-12s: %3d%% (阈值: %3d%%)\n" \
                    "CPU使用率" "$CPU" "$CPU_THRESHOLD" \
                    "内存使用率" "$MEM" "$MEMORY_THRESHOLD" \
                    "磁盘使用率" "$DISK" "$DISK_THRESHOLD" \
                    "网络丢包率" "$NET" "$NETWORK_THRESHOLD")

            BODY+="\n▌ 系统状态\n"
            BODY+="主机名  : $(hostname)\n"
            BODY+="检测时间: $TIMESTAMP\n"
            BODY+="运行时间: $(uptime -p)\n"

            if send_alert "$SUBJECT" "$BODY"; then
                LAST_ALARM_TIME=$CURRENT_TIME
                echo "$TIMESTAMP 报警已发送: ${ALERTS[*]}"
            else
                echo "$TIMESTAMP 邮件发送失败"
            fi
        fi
    fi
done
继续写自动部署脚本
- install_monitor.sh
#!/bin/bash
# 修复版系统监控安装脚本


# 检查并安装telnet
install_telnet() {
    if ! command -v telnet &> /dev/null; then
        echo "正在安装telnet客户端..."

        if [[ -f /etc/debian_version ]]; then
            sudo apt-get update -qq
            sudo apt-get install -y telnet
        elif [[ -f /etc/redhat-release ]]; then
            sudo yum install -y telnet
        elif [[ -f /etc/alpine-release ]]; then
            sudo apk add busybox-extras
        else
            echo "无法自动安装telnet:未知的Linux发行版"
            exit 1
        fi

        if ! command -v telnet &> /dev/null; then
            echo "telnet安装失败!请手动安装后重试"
            exit 1
        else
            echo "telnet安装成功:$(which telnet)"
        fi
    else
        echo "telnet已安装:$(which telnet)"
    fi
}

# 安装监控脚本(修复文件创建问题)
install_monitor() {
    echo "正在下载并安装监控脚本..."

    # 创建临时目录并检查
    TMP_DIR=$(mktemp -d)
    if [[ ! -d "$TMP_DIR" ]]; then
        echo "无法创建临时目录!"
        exit 1
    fi

    TMP_SCRIPT="${TMP_DIR}/system_monitor.sh"

    # 下载脚本
    curl -sL https://raw.githubusercontent.com/maifeipin/AutoIT/main/system_monitor.sh -o "$TMP_SCRIPT"

    if [[ ! -f "$TMP_SCRIPT" ]]; then
        echo "下载监控脚本失败,脚本未找到!"
        exit 1
    fi


    # 安装脚本到指定目录
    sudo install -m 755 "$TMP_SCRIPT" /usr/local/bin/system_monitor
    if [[ $? -ne 0 ]]; then
        echo "安装监控脚本失败!"
        exit 1
    fi

    rm -f "$TMP_SCRIPT"

    # 创建服务文件
    sudo tee /etc/systemd/system/system-monitor.service > /dev/null <<EOF
[Unit]
Description=System Resource Monitor
After=network.target
StartLimitIntervalSec=60
StartLimitBurst=3

[Service]
Type=simple
ExecStart=/usr/local/bin/system_monitor
Restart=always
RestartSec=30
Environment="PATH=/usr/local/sbin:/usr/local/bin:/usr/sbin:/usr/bin:/sbin:/bin"

[Install]
WantedBy=multi-user.target
EOF

    # 重新加载 systemd 配置
    sudo systemctl daemon-reload
}

# 启动服务(增加状态检查)
start_service() {
    echo -e "\n启动监控服务..."
    sudo systemctl enable --now system-monitor

    # 等待服务启动
    for i in {1..5}; do
        if systemctl is-active system-monitor &>/dev/null; then
            echo "服务启动成功!"
            return 0
        fi
        sleep 1
    done

    echo "服务启动失败,请检查:"
    journalctl -u system-monitor -n 10 --no-pager
    exit 1
}

# 主安装流程
echo "=== 系统监控脚本安装程序 ==="
install_telnet
install_monitor

start_service

# 验证安装
echo -e "\n安装验证:"
echo -e "1. 服务状态:$(systemctl is-active system-monitor)"
echo -e "2. 脚本路径:$(ls -lh /usr/local/bin/system_monitor)"
echo -e "3. 最近日志:"
journalctl -u system-monitor -n 5 --no-pager | grep -v "Started\|Starting"

echo -e "\n安装完成!使用以下命令查看实时日志:"
echo "journalctl -u system-monitor -f"
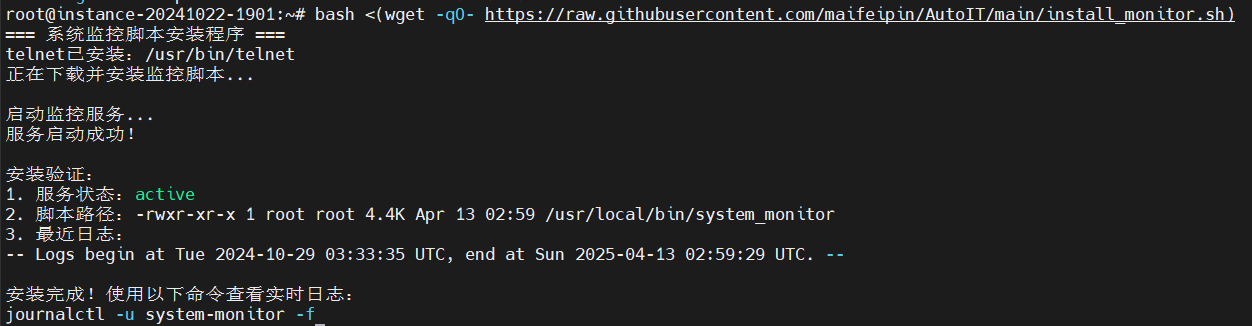
测试自动部署
先在一台上测试,测试完成后提交到github上,其余的机器直接下载安装即可。
bash <(wget -qO- https://raw.githubusercontent.com/maifeipin/AutoIT/main/install_monitor.sh)

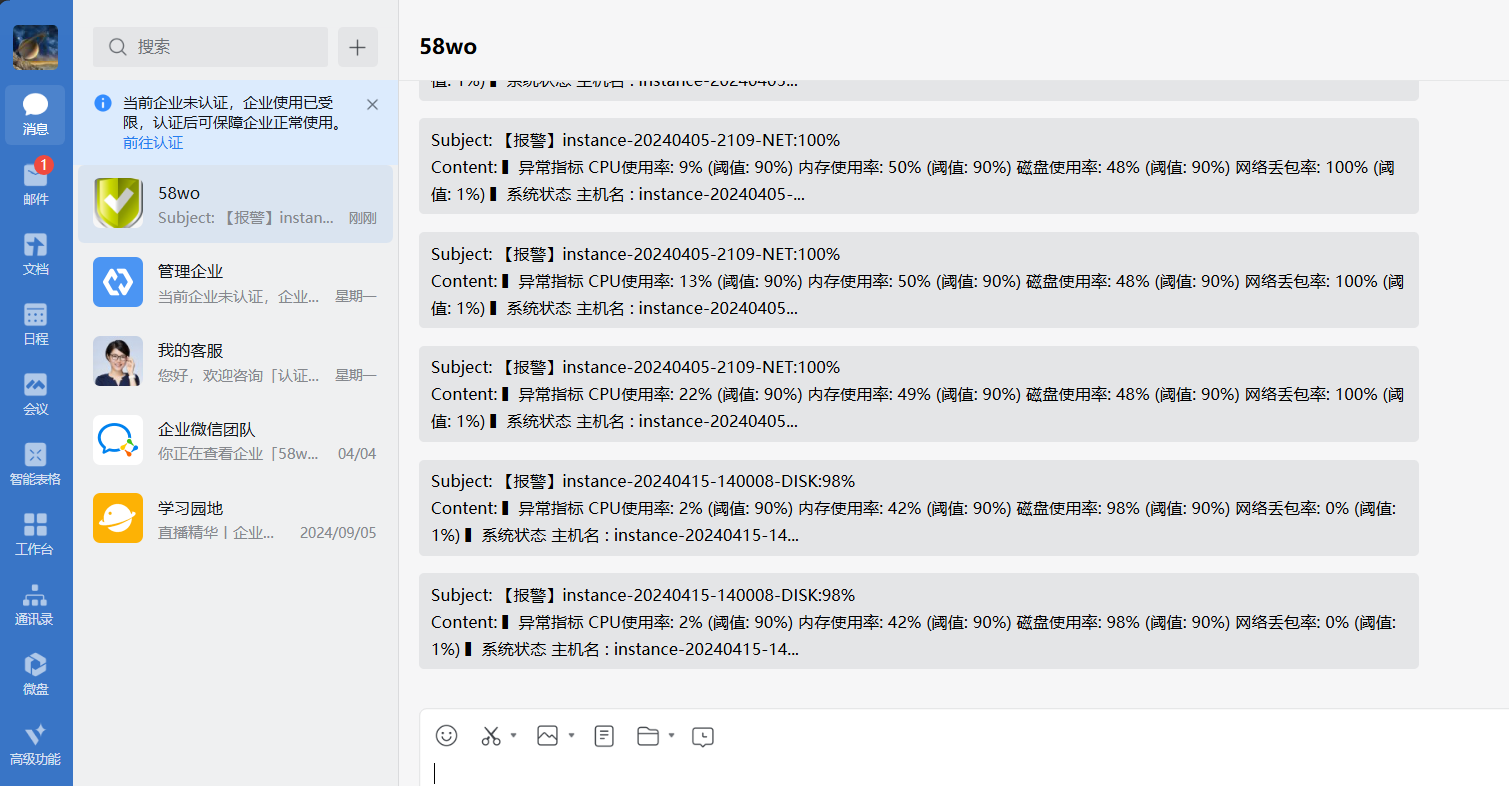
自动推送到企微
找一个稳定可靠的机子上部署 邮件转自建企业微信通知的服务,通知成功重置邮件状态避免重复发送。
 #!/bin/bash

# 定义 API 地址和认证信息
MAIL_API="https://mail.maifeipin.com/api/v1"
SEND_MESSAGE_API="http://127.0.0.1:1234/send_message"
API_TOKEN="_token"
MAIL_AUTH="user:password"

# 临时存储未读邮件ID的文件
UNREAD_IDS_FILE=$(mktemp)

# 获取未读邮件并处理
curl -s -X GET "$MAIL_API/messages" \
  -H 'accept: application/json' \
  -u "$MAIL_AUTH" \
  | jq -c '.messages[] | select(.Read == false)' \
  | while read -r email; do
    # 提取邮件信息
    id=$(echo "$email" | jq -r '.ID')
    subject=$(echo "$email" | jq -r '.Subject')
    content=$(echo "$email" | jq -r '.Snippet')

    echo "Processing email: $subject"

    # 调用 send_message API
    response=$(curl -s -X POST "$SEND_MESSAGE_API" \
      -H "Authorization: Bearer $API_TOKEN" \
      -H "Content-Type: application/json" \
      -d "$(jq -n --arg subj "$subject" --arg cont "$content" '{"message": ("Subject: " + $subj + "\nContent: " + $cont)}')")

    # 检查是否发送成功
    errcode=$(echo "$response" | jq -r '.errcode')
    if [ "$errcode" -eq 0 ]; then
      echo "Successfully sent message: $subject"
      # 存储成功发送的邮件ID
      echo "$id" >> "$UNREAD_IDS_FILE"
    else
      errmsg=$(echo "$response" | jq -r '.errmsg')
      echo "Failed to send message: $subject - $errmsg" >&2
    fi
  done

# 如果有成功发送的邮件,标记为已读
if [ -s "$UNREAD_IDS_FILE" ]; then
  # 构建ID数组JSON
  ids_json=$(jq -Rn '[inputs]' < "$UNREAD_IDS_FILE")

  echo "Marking messages as read..."
  mark_result=$(curl -s -X PUT "$MAIL_API/messages" \
    -H 'accept: application/json' \
    -H 'content-type: application/json' \
    -u "$MAIL_AUTH" \
    -d "{\"IDs\": $ids_json, \"Read\": true}")

  if [ $? -eq 0 ]; then
    echo "Successfully marked messages as read"
  else
    echo "Failed to mark messages as read: $mark_result" >&2
  fi
fi

# 清理临时文件
rm -f "$UNREAD_IDS_FILE"
再写一个自动检查证书过期时间的脚本
- check_cert_expiry.sh
#!/bin/bash

# 定义API配置
API_URL="http://127.0.0.1:1234/send_message"
API_TOKEN="_token"

# 存储所有证书状态的数组
declare -a CERT_STATUSES

# 查找所有nginx配置中的SSL证书并检查过期时间
NGINX_CONF_PATHS=(
    "/etc/nginx/nginx.conf"
    "/etc/nginx/conf.d/*.conf"
    "/etc/nginx/sites-enabled/*"
    "/etc/nginx/sites-available/*"
    "/usr/local/nginx/conf/*.conf"
)

# 临时文件
TEMP_CERTS_FILE=$(mktemp)

# 提取证书路径
for conf in ${NGINX_CONF_PATHS[@]}; do
    for file in $(find /etc/nginx -type f -name "*.conf" 2>/dev/null); do
        grep -E '^\s*ssl_certificate\s+' "$file" | awk '{print $2}' | sed "s/['\";]//g" >> "$TEMP_CERTS_FILE"
    done
done

# 处理路径并检查证书
while read -r cert_path; do
    [[ "$cert_path" != /* ]] && cert_path="$(dirname "$file")/$cert_path"

    if [ -f "$cert_path" ]; then
        cert_info=$(openssl x509 -noout -dates -in "$cert_path" 2>/dev/null)

        if [ $? -eq 0 ]; then
            # 提取证书的域名
            domain=$(openssl x509 -noout -subject -in "$cert_path" | sed 's/.*CN=//')

            expiry_date=$(echo "$cert_info" | grep notAfter | cut -d= -f2)
            expiry_epoch=$(date -d "$expiry_date" +%s)
            current_epoch=$(date +%s)
            days_left=$(( (expiry_epoch - current_epoch) / 86400 ))

            if [ $days_left -lt 0 ]; then
                status="已过期"
            elif [ $days_left -lt 7 ]; then
                status="即将过期(剩余${days_left}天)"
            elif [ $days_left -lt 30 ]; then
                status="注意(剩余${days_left}天)"
            else
                status="正常(剩余${days_left}天)"
            fi

            CERT_STATUSES+=("域名: ${domain} 证书: ${cert_path##*/} 状态: ${status} 过期时间: ${expiry_date}")
        else
            CERT_STATUSES+=("证书: ${cert_path##*/} 状态: 无效证书文件")
        fi
    else
        CERT_STATUSES+=("证书: ${cert_path##*/} 状态: 文件不存在")
    fi
done < <(sort -u "$TEMP_CERTS_FILE")

# 构建消息内容
if [ ${#CERT_STATUSES[@]} -gt 0 ]; then
    message="Nginx证书检查报告:"
    for status in "${CERT_STATUSES[@]}"; do
        message+="\n- ${status}"
    done
else
    message="未找到任何Nginx证书配置"
fi

# 发送通知
curl -X POST "$API_URL" \
     -H "Authorization: Bearer $API_TOKEN" \
     -H "Content-Type: application/json" \
     -d "$(jq -n --arg msg "$message" '{"message": $msg}')"

# 清理临时文件
rm -f "$TEMP_CERTS_FILE"