
得益于电子工业讯猛发展和更新,小黄鱼上的4*2.5的小主机来来到300元的门槛。加上原来的NAS也是2.5G,就把原来的J1900换掉了,顺便更新一下系统,网络拓扑没变。 光猫—>路由->所有房间->所有设备。
- 光猫Lan(192.168.1.x).
- 路由器Wan(192.168.1.x).
- 路由器Lan(192.168.2.x).
- 所有设备(192.168.2.x).
路由器升级
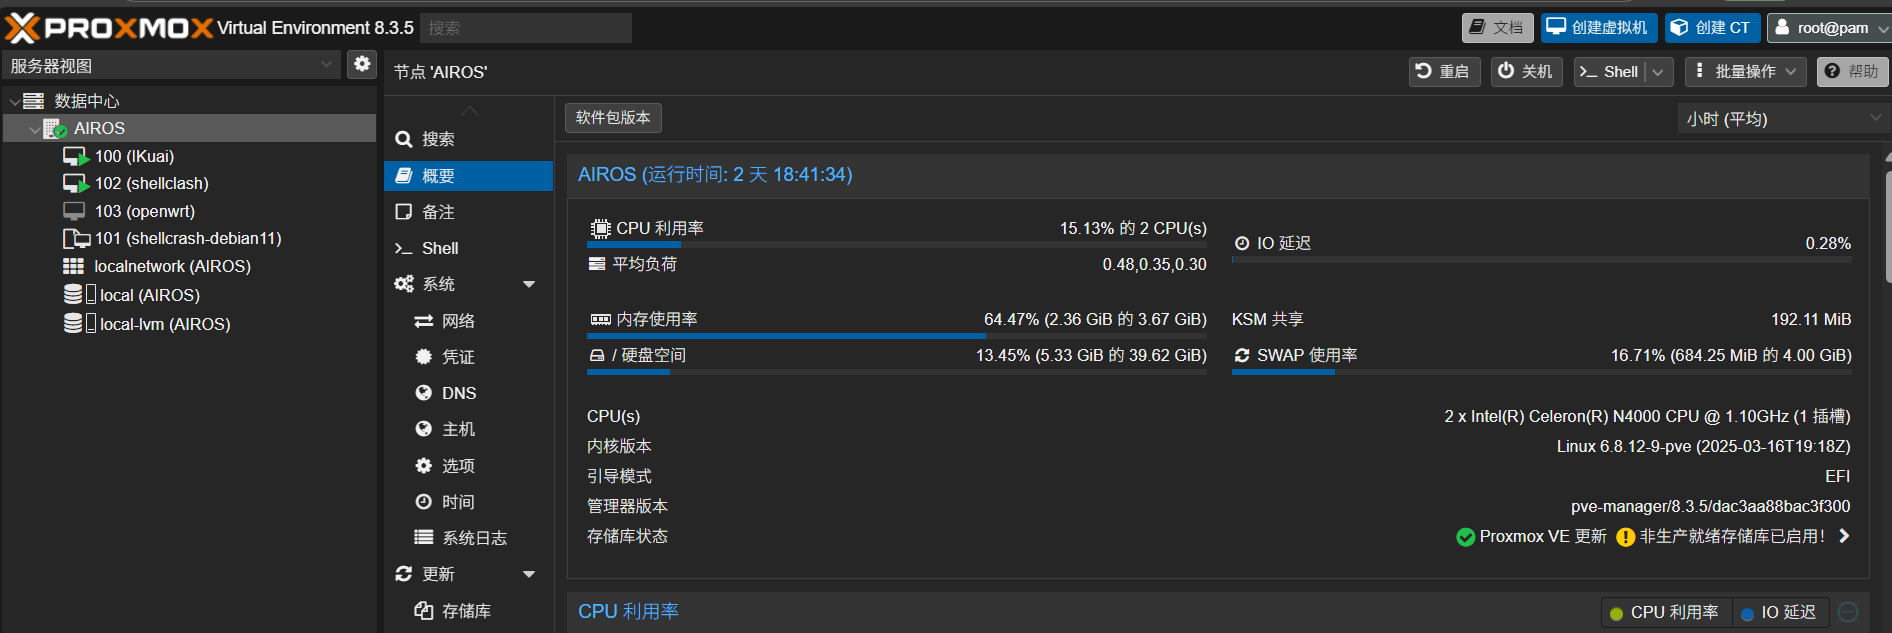
硬件原来是J1900 4 * 1G更换为N4000 4 * 2.5G,软件由原来的ikuai+kuai虚拟op 更换为pve+pve虚拟ikuai+pve虚拟op+pve虚拟debian。
- pve安装:
- 换源 注掉原来的 /etc/apt/sources.list更换 对应版本的debain 源。
注掉/etc/apt/sources.list.d/ 下的pve-enterprise.list 和ceph.list 增加社区源deb http://ftp.debian.org/debian bookworm main contrib non-free non-free-firmware deb http://security.debian.org bookworm-security main contrib non-free non-free-firmware deb http://ftp.debian.org/debian bookworm-updates main contrib non-free non-free-firmwareecho "deb http://download.proxmox.com/debian bookworm pve-no-subscription" > /etc/apt/sources.list.d/pve-no-subscription.list - 直通 把 /etc/default/grub的 GRUB_CMDLINE_LINUX_DEFAULT 行 换掉为:
执行 update-grub 生效GRUB_CMDLINE_LINUX_DEFAULT="quiet intel_iommu=on iommu=pt pcie_port_pm=off"
-
网络设计,把PVE管理口(安装过程中的网络)设计为Wan ,同时也是光猫的一个Lan,这样为了避免光猫下游网络出问题时,又要接显示器和键盘来管理网络和虚拟机。保证只要光猫还在,pve管理界面和功能都是可以用的。网上100%都是把管理口放在LAN,不知哪位大佬带的头。还有旁路由或网关互指等导致家庭网络问题不少,说白了,把PVE管理口入在WAN 口 就避免了先有鸡和先有蛋的问题,放Lan 纯为了简单模拟路由器,默认linux桥vmbr0 添加了除wan 之外 其它网口。
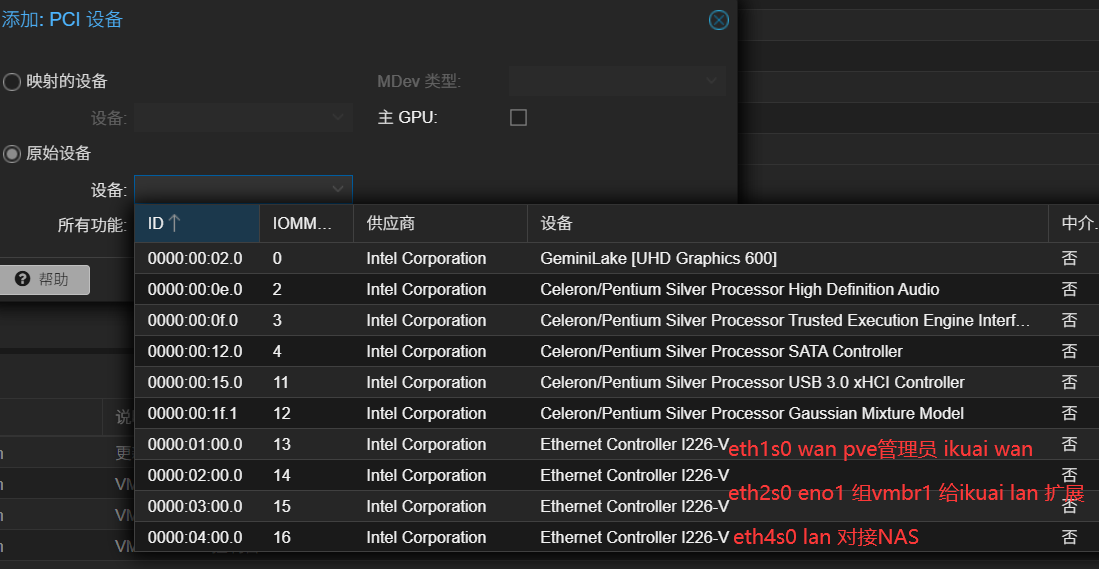
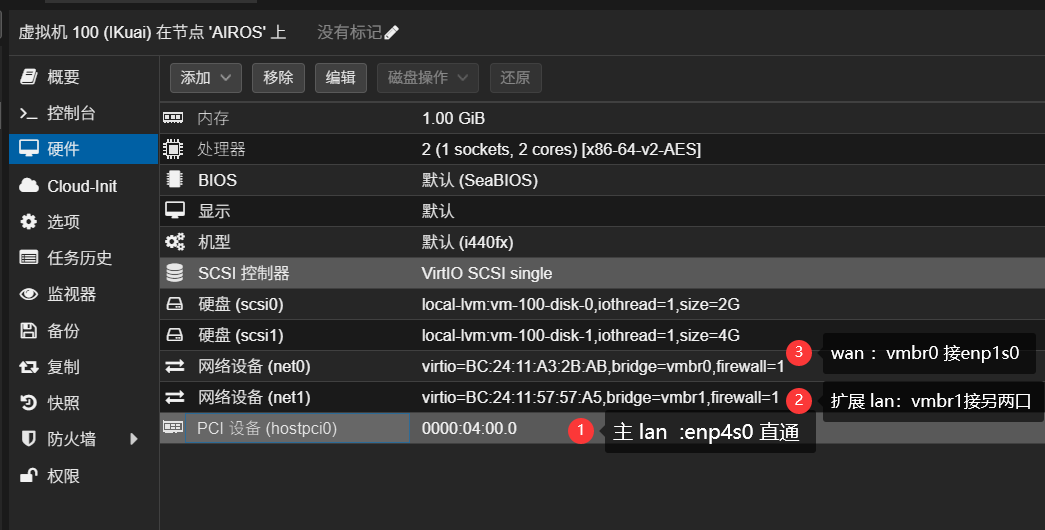
下面是PVE网络 四网口分配情况,把其中enp4s0直通给ikuai的主Lan,作为下游NAS对接口,再添加linux桥vmbr1 添加了enp2s0,eno1 后 把 vmbr1 添加到 ikuai 作主lan的 扩展网卡,这样所有网络都通了。下游所有房间都在ikuai的LAN (192.168.2.x)上了。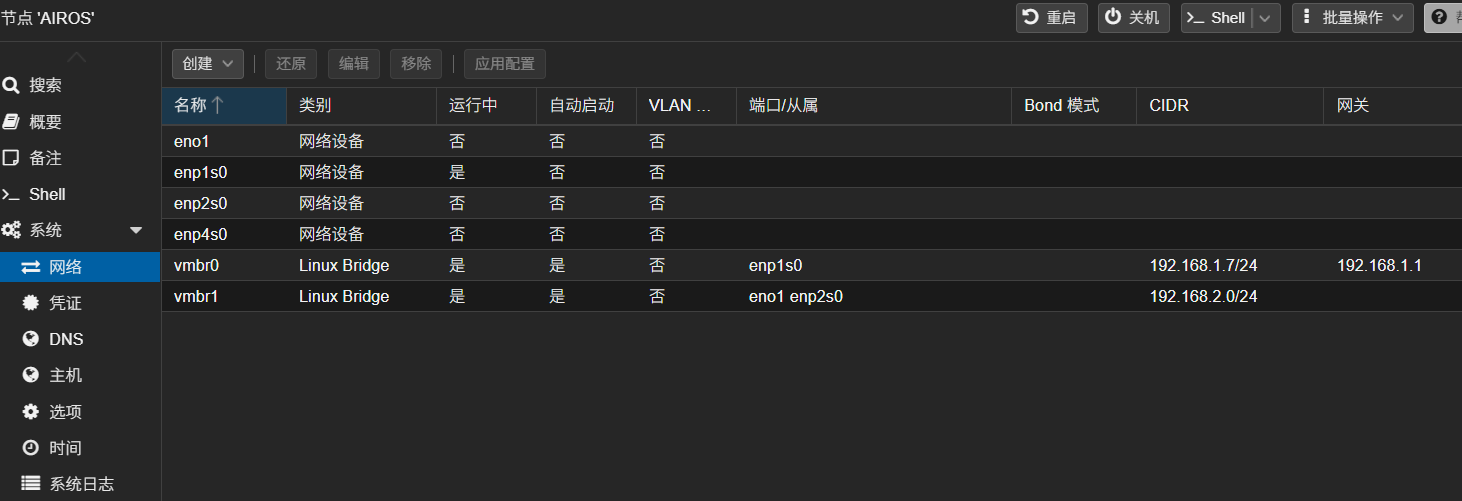
-
制作debia11 cloud 模板 母鸡,以便创建透明网关,tailscale 子网等小鸡。
-
编译openwrt,网上很多在线构建openwrt 都是ipk融合怪,自己编译镜像385MB,网上免费在线编译相同组件基本在都是1GB左中。
git clone https://github.com/openwrt/openwrt #下载 cd openwrt #进入主目录 nano feeds.conf.default #组件包修改 ./scripts/feeds update -a && ./scripts/feeds install -a #构件组件索引 make clean #二次编译时用 make menuconfig # 手动选择具体功能 make download -j8 V=s #下载依赖 make -j$(nproc) || make -j1 V=s #编译生成镜像 -
开通 在openwrt 的 DHCP,关闭ikuai的DHCP,使用openwrt的DHCP选项功能给局域网内所有设备自动分配不同的网关(ikuai和openwrt),不用各个客户端手动修改网关,本站之前有写过。
-
在debian小鸡中使用tailscale组网,使用exit node 把流量转走,用dante-server 把192.168.2.x的流量转给 tailscale0 ,并开启sockets5 给局域网和op使用tailscale的网络。
dante-server的配置 nano /etc/danted.conflogoutput: /var/log/danted.log !# 定义监听的端口和接口 internal: eth0 port = 1080 !# 根据实际的网卡名替换 eth0,1080 为 SOCKS5 默认端> external: tailscale0 !# 外部接口 method: username none !# 身份验证方法,可选,none 为无身份验证 user.privileged: root user.unprivileged: nobody #可以添加一个系统账号作认证,给 /usr/bin/false 权限(没有系统命令交互权限) !# 允许连接的客户端 IP client pass { from: 0.0.0.0/0 to: 0.0.0.0/0 log: connect disconnect } !# 允许代理的服务 socks pass { from: 0.0.0.0/0 to: 0.0.0.0/0 log: connect disconnect error } -
安装 链式 Doh 服务
用debian小鸡安装adGuardHome-> smartdns(分流) ;若国际线路->国外vps (dnsmaq)